GeMarkt Blog · Reference
How to Find High-Resolution Public Domain Art
Find a museum's original art download, check its image terms and judge whether the pixels suit your print. Bigger files are not always better files.

Start with the museum or archive’s individual object page, find its designated open image, and download the original file rather than a preview. Then check the pixel dimensions against the size you want to print. “Public domain” answers a rights question; “high resolution” describes image information. You need to assess both.
A useful search does not end with the largest number or the brightest-looking scan. The file must show the correct work, include the part you need and retain convincing detail. The following method is intended for a particular picture you want to use, not for bulk downloading a collection.
Start with the object, not the biggest result
Search the artist and exact title together with a museum or collection name. Add a date or accession number when the title describes a series. “Water Lilies” can point to many Monet paintings; a very large file of the wrong canvas does not solve your problem.
Open the institution’s own record and compare its description with the image. Check whether you are seeing the whole painting, a detail, a print after another work or a later copy. For an illustrated book, the edition matters as much as the plate title.
Write down the object identifier before choosing a download. This is our practical recommendation: it gives you a stable reference when different websites abbreviate titles or spell the artist’s name differently. A filename such as “famous-painting-large.jpg” does not identify a work reliably.
Three useful institutional starting points
The following are starting points, not a claim that every file in each collection is unrestricted.
The Metropolitan Museum of Art: use the object record and its designated Open Access image. The Met’s image FAQ explains that available pixel dimensions vary and that users should assess suitability for the intended reproduction. A missing image can reflect unfinished photography or other practical circumstances; it is not, by itself, a copyright verdict.
National Gallery of Art, Washington: the free images and open-access page directs users to downloads on individual artwork records. Read the specific open-access terms, which distinguish designated images from the website’s other material. The Gallery’s waiver concerns rights it holds, not a guarantee about every possible third-party claim.
Getty: the Open Content programme identifies qualifying images with a CC0 designation and links to its collection searches. Follow the designation through to the individual image. An institution’s participation in open access does not make an unrelated photograph of the same object part of that programme.
If the holding institution does not offer a suitable file, a carefully documented Commons record may help. Use our Commons file checklist to check its source and terms rather than treating the repost as new permission.
Find the original download
Look for the download attached to the object, not a screenshot of the page. Compare the downloaded file’s dimensions with those of the thumbnail. A small image can look crisp on a phone while carrying too few pixels for a large print.
Some institutions use IIIF, a standard for delivering and viewing images. It is a technical system, not a licence. The Art Institute of Chicago’s API documentation separates object data from image delivery and documents available image sizes. A zoom viewer does not automatically mean that every size is freely downloadable or every image is public domain.
Use the institution’s provided download or documented route. If access is restricted, ask for a file or choose another source; do not assume that changing an address grants permission to bypass the limit.
Do not judge resolution from file size alone. A heavily compressed large image and a small, minimally compressed image can occupy similar disk space. Width and height in pixels are the useful starting numbers.
Turn pixels into a real print size
PPI means pixels per inch. Divide each pixel dimension by the proposed PPI to find the corresponding physical dimensions.
For a hypothetical 3600 × 2400 pixel file:
| Output density | Result without adding pixels |
|---|---|
| 300 PPI | 12 × 8 inches |
| 200 PPI | 18 × 12 inches |
| 150 PPI | 24 × 16 inches |
These are arithmetic examples, not three equally good print recommendations. Viewing distance, image detail, printing process and the condition of the source affect the result. Ask the printer for requirements at the size and material you want.
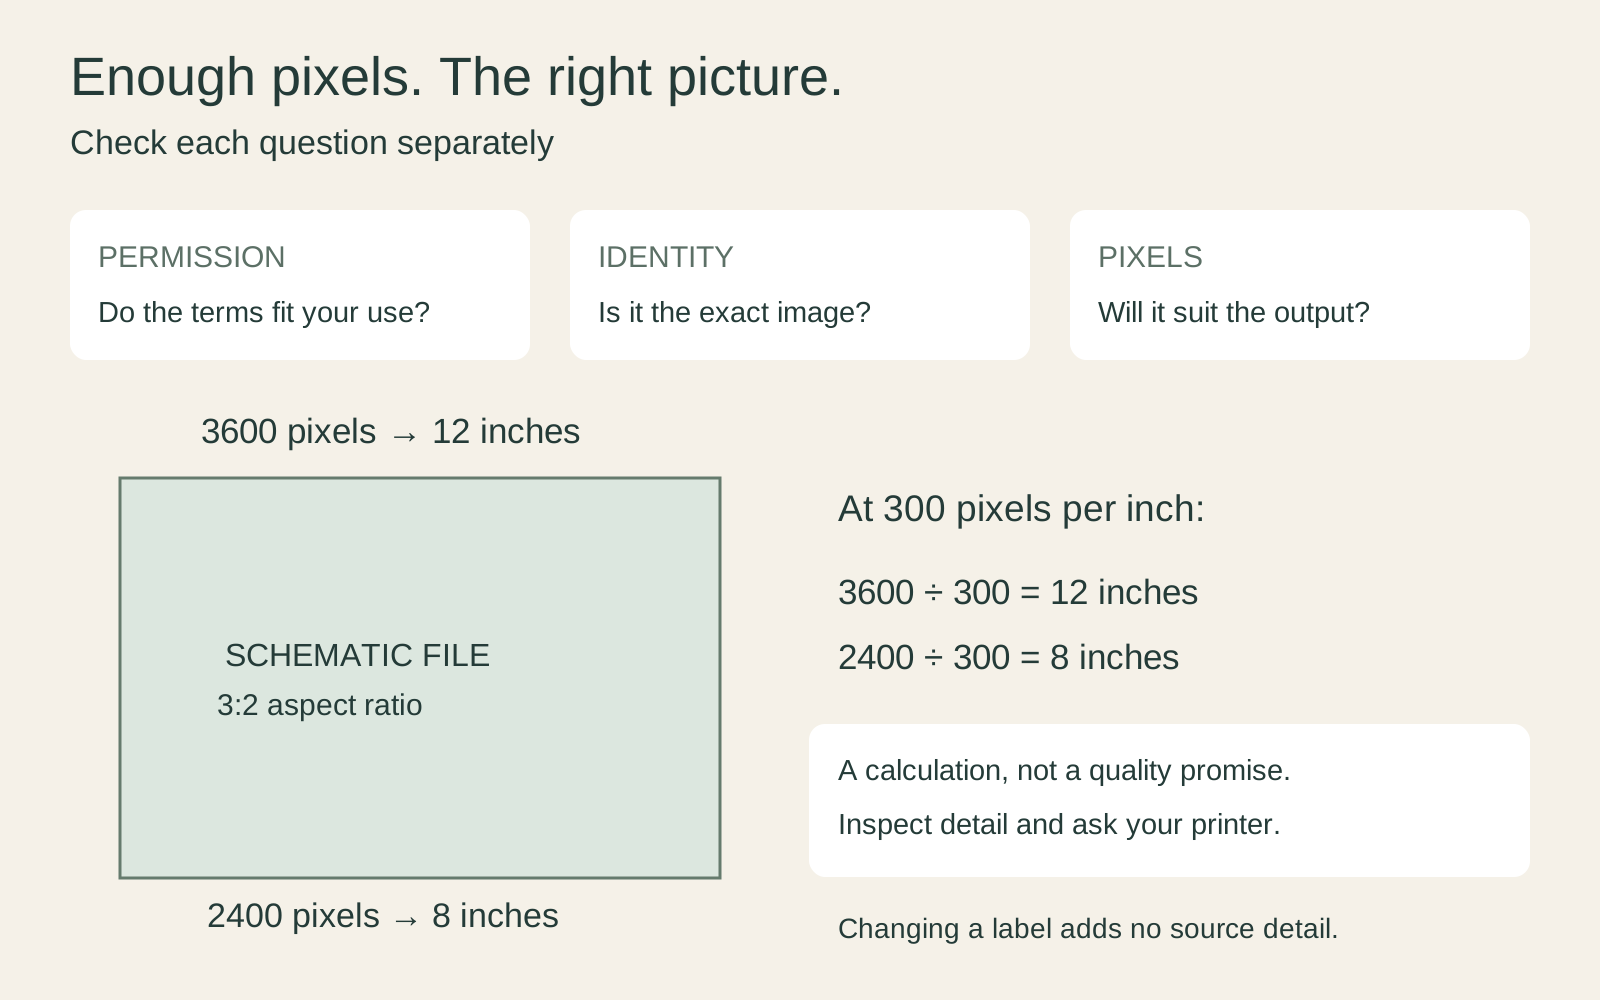
Adobe’s resolution guidance distinguishes pixel dimensions, resolution and resampling. Resampling changes the pixel count; changing a print-size setting without resampling does not add source information.
For crop calculations and a fuller explanation of PPI versus printer DPI, see image resolution and print size. Remember that removing a border or changing the picture’s proportions reduces the pixels available for the final image.
Inspect the picture, not only the numbers
Open the image at 100% magnification so you can examine its actual pixels. Look at a face, a fine line, a signature and a smooth area. This is a practical quality check rather than a museum authentication method.
Ask what is visible: genuine-looking surface detail, a coarse printed-dot pattern, blocky compression, or a soft image enlarged far beyond its useful size? Compare another well-documented reproduction when uncertain. Different scans, lighting and restoration states can produce different appearances without proving that one is fraudulent.
Check the boundaries too. Are the edges complete? Is a caption included beneath the image? Would removing it also cut into the artwork? Never describe a detail as the complete painting.
Brightness on your screen is not evidence of accuracy. Stronger colours can be appealing while moving away from the source. Our guide to why prints of the same painting look different explains the distinctions worth checking before choosing a reproduction.
When the file is too small
Choose among three practical options: print smaller, find a better documented scan, or ask the institution about another image. Additional photography or file preparation may involve a service charge even where a designated open file is free to use. The Met’s FAQ describes routes for additional image requests; availability is not guaranteed.
Treat upscaling as a processing choice, not a discovery of missing historical detail. If fine lettering or facial features matter, inspect them closely after processing and avoid presenting reconstructed details as evidence about the original.
For a planned print, make a small test at the intended output scale before paying for the large version. Enlarging the whole picture on a monitor is less useful than examining the part that will expose a weak file.
Save a source record with the image
Keep the unedited download, exact object and image links, terms, access date, pixel dimensions and any intended crop together. Work from a copy. This short record prevents a later replacement image from inheriting the wrong credit or permission.
Before proceeding, confirm three separate answers: the terms fit the use; the image shows the right object; the pixels and reproduction quality suit the output. If one answer is missing, a larger download does not fill the gap.
Use CC0, Public Domain Mark and museum licences for the rights labels, and the printer’s specifications for production. Neither this search method nor a large file is a guarantee of legal clearance or print quality.
Editorial record
About this article
- Author
- Publisher
- GeMarkt
- Published
- Reviewed
- Internal source & rights check. Conducted by GeMarkt Research Review. This is an internal editorial check—not independent peer review.
- Source standard
- Rights guide source standardSeparates the underlying work from the source file, records the review date, and links the evidence used for the conclusion.
Found a claim that needs checking? Report a factual error.