GeMarkt Blog · Practical guide
Image Resolution and Print Size: How Big Can a File Go?
Calculate print size from pixels, understand PPI and DPI, and check crops and enlargements without treating 300 as a universal quality guarantee.

Divide the file’s pixel width by the proposed print width in inches to find its print density in PPI. Do the same for the height. That calculation tells you how far you are spreading the available pixels, not whether those pixels contain sharp, accurate detail. The largest sensible print depends on the source, the crop, the printing process and how the finished piece will be viewed.
Start with the pixel dimensions
Open the actual downloaded image and look for its dimensions in pixels, such as 3600 × 2400. Do not use the dimensions of a shop thumbnail, a screenshot or the picture displayed inside an email. Keep an untouched copy of the original file before experimenting.
A label such as “high resolution” is too vague to calculate with. A large file in megabytes is not conclusive either: file format, compression and the content of the picture affect storage size. Ask for width and height in pixels when a seller supplies only a file-size claim.
Adobe’s explanation of image size separates pixel dimensions from the physical size and resolution assigned for printing. A 3600 × 2400 image contains 8,640,000 pixels. Writing a different print-resolution number into its metadata does not, on its own, give those pixels more detail.
Calculate the print density
For a proportional 3600 × 2400 file, a 12 × 8 inch print gives 3600 ÷ 12 = 300 PPI across its width and 2400 ÷ 8 = 300 PPI down its height. At 18 × 12 inches it gives 200 PPI; at 24 × 16 inches it gives 150 PPI. No resampling is included in these examples.
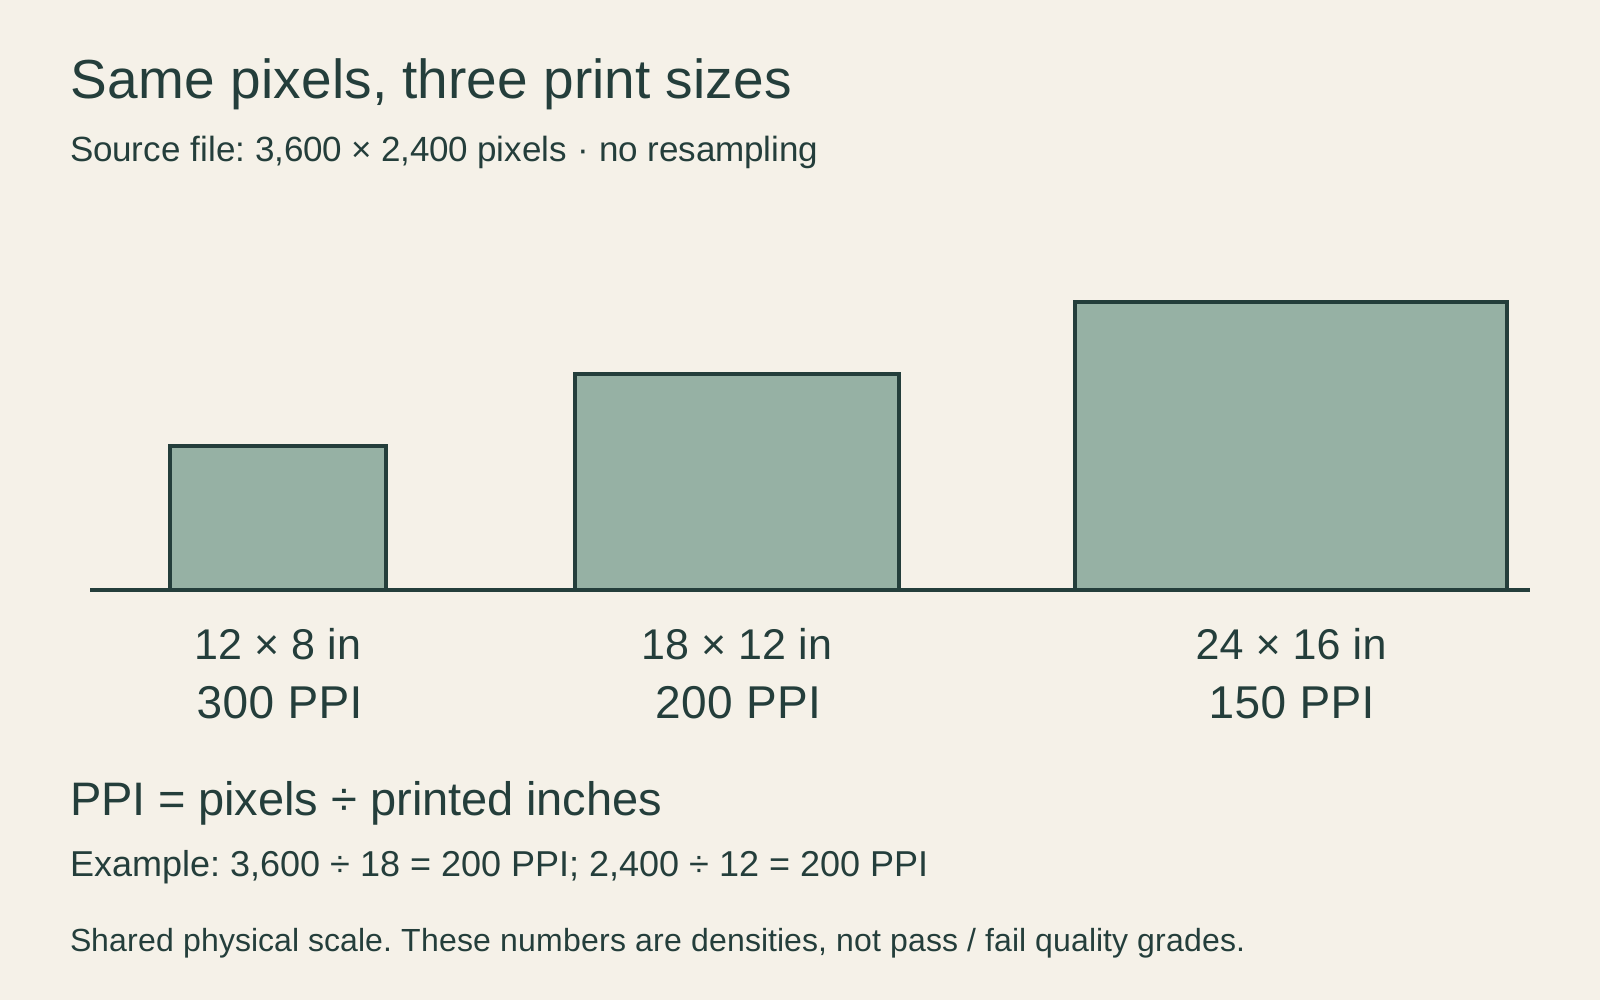
For centimetres, divide the measurement by 2.54 first. A 45.72 cm wide print is 18 inches wide, so the same file gives 200 PPI. You can also work backwards: at a chosen 240 PPI, 3600 ÷ 240 gives a width of 15 inches and 2400 ÷ 240 gives a height of 10 inches. That is a planning calculation, not an endorsement of one density for every image.
Keep PPI and DPI separate
PPI means pixels per inch in the image at its intended print size. DPI means dots per inch produced by a printing device. A printer can use several ink dots to describe one image pixel; its advertised dot resolution is not the pixel density your file must match. Adobe distinguishes the two measurements.
Printing services sometimes use “DPI” when discussing uploaded image density. Rather than argue about the label, ask for the required pixel dimensions at the final print size. A request for 300 image pixels per inch across a 12-inch width means 3600 pixels, whether the upload screen labels the field correctly or not.
Check the image shape before the number
The example file is 3:2. A 12 × 8 print keeps that shape, but a 10 × 8 print is 5:4. Filling the latter would require a crop; fitting the complete picture would leave borders. Stretching it to fill both dimensions would distort the composition.
If you crop the source to 3000 × 2400 pixels, it fits 10 × 8 inches at 300 PPI. The cropped result has lost 600 pixels of width in total. Whether that removes empty sky or someone’s hand is an artistic decision, not a resolution setting. Our guide to painting proportions and standard frames explains the alternatives.
Inspect the detail that the file actually contains
Look at a face, small lettering, a fine line and an area of gradual colour. A file can have generous dimensions but still contain camera blur, compression blocks, harsh sharpening outlines or an earlier enlargement. More pixels do not prove a better capture.
Viewing at 100% is useful for examining the file’s pixels, but it is not automatically a life-size view of the eventual print. The physical result also depends on the screen’s pixel density and the application’s display behaviour. Use it to find defects, not to decide that a wall print must look perfect from the distance of your keyboard.
Compare suspicious details with the source institution’s record where available. Preserve a soft brushstroke if it belongs to the painting; do not mistake the absence of photographic crispness for damage that needs correcting.
Treat enlargement as a new processing step
Resampling changes the pixel count. Enlarging 3600 pixels to 7200 produces a bigger digital grid, but not a second photograph of the artwork. Conventional interpolation estimates added values; an AI enlargement may also introduce plausible-looking details. Neither should be treated as historical evidence of marks the artist made.
If enlargement is necessary, keep the source unchanged and make a separately named output. Inspect faces, signatures and linework before accepting it. Do not sharpen repeatedly until every edge acquires a halo. A smaller faithful print may be preferable to a larger image whose surface has been invented.
Ask the printer the right question
Send the pixel dimensions, intended image size and any proposed crop. Ask what the particular product requires and whether the service will resize or enhance your file automatically. A specific paper print and a large canvas need not share identical requirements.
For example, Printful’s own graphics guide recommends 300 DPI for its paper prints and directs users to product-specific file guidance. That is a provider’s instruction for its workflow, not proof that every 299 PPI file is unusable or every 300 PPI file is good.
Make a small proof at the final scale
For an important enlargement, ask for a representative portion printed at the intended final scale, on the intended material and process. A small whole-picture print shrinks away the very defects you are trying to evaluate. Include a demanding detail and a dark or softly graduated area in the sample.
View the proof close up and at the likely display distance. If you can see distracting artefacts, return to the source or reduce the size before changing the artwork. The useful answer to “how big?” is the largest version whose file, composition and physical proof you are comfortable with, not the largest number an export box accepts.
Editorial record
About this article
- Author
- Publisher
- GeMarkt
- Published
- Reviewed
- Internal source & rights check. Conducted by GeMarkt Research Review. This is an internal editorial check—not independent peer review.
- Source standard
- Buying guide source standardSeparates measured or first-hand evidence from general guidance and keeps practical limits visible.
Found a claim that needs checking? Report a factual error.