GeMarkt Blog · Practical guide
Picture Ledges and Leaning Art
Arrange framed prints on a picture ledge without hiding the art, and separate the styling decisions from the shelf, wall and restraint checks.

A picture ledge is useful when you want to change a small group of framed prints without moving a hook for every picture. Start with a few frames whose dimensions and weight meet the ledge manufacturer’s instructions, then arrange them so the important parts remain visible. Leaning is a display method, not a guarantee that a frame cannot fall.
The most attractive arrangement is not necessarily the one containing the most pictures. A clear view of two prints may work better than a layered row in which you can recognise only the top corners.
Choose a ledge for changing pictures
A ledge suits a display that changes: a postcard beside a print, a photograph you bring forward for a while, or a small collection that grows slowly. Its horizontal edge gives varied frames a common base. That can make a mixed group easier to organise than a wall where every picture has its own position.
Choose conventional wall hanging instead if the pictures need to remain completely visible, if a frame exceeds the ledge’s limits, or if the proposed location cannot be made secure. A ledge is also not automatically a no-drill solution. Installing the shelf usually requires its own attachment to the wall.
Decide which picture matters most before buying a long shelf. Measure the finished frame, including its height and depth. If that picture cannot be accommodated, choose another display system rather than treating the manufacturer’s limit as a styling suggestion.
Check the specific ledge before arranging
Read the instructions for the exact model and length you have. Check the permitted load, frame dimensions, usable depth and installation method. The complete framed objects count toward the load, not just the paper prints. A front lip alone does not establish that every frame will stand securely.
For example, IKEA’s MOSSLANDA instructions limit pictures to 45 cm in height and explain that taller ones can be unstable on that ledge. They also require wall fixings suited to the wall material. Those are instructions for that product, not universal dimensions for all shelves.
Do not transfer a weight figure from a similar-looking shelf or assume the wall is suitable because the shelf itself is strong. If the frame, fixing or wall condition is uncertain, ask the manufacturer or a qualified installer. Adding an adhesive pad is not a substitute for an approved restraint or mounting method.
Compare spacing with overlap
Once the installation and frames are suitable, test the visual arrangement with paper shapes or on a clear, supported work surface. Use outside frame dimensions. A print advertised as 30 × 40 cm can have a much larger finished outline once its mat and frame are included.
In this example, a 120 cm ledge holds proposed frame widths of 40, 30 and 24 cm. Placed separately with two 8 cm gaps, the group spans 40 + 8 + 30 + 8 + 24 = 110 cm. Centring that group leaves 5 cm at each end.
With the same frames overlapping by 10 cm and 6 cm in the front view, the combined span becomes 40 + 30 + 24 − 10 − 6 = 78 cm. That leaves 21 cm at either end if centred. The frames have not become smaller or lighter: their outlines now conceal parts of one another.
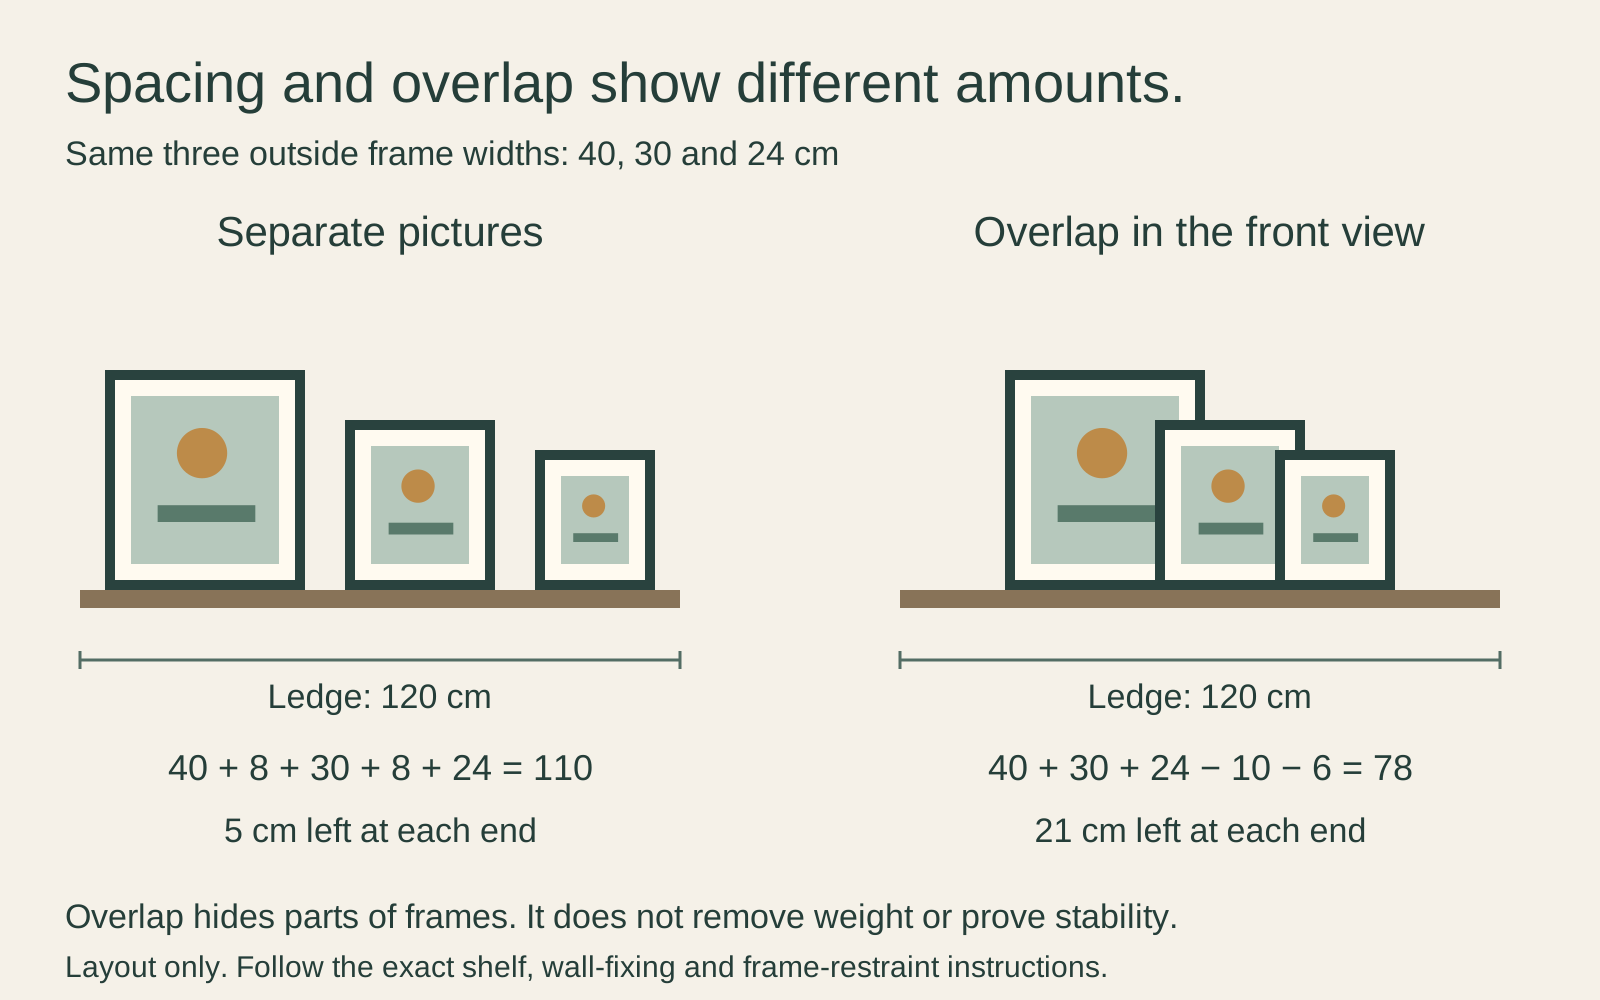
Neither arrangement is inherently better. Choose separation for pictures that need to be read whole. Try modest overlap when an unimportant outer border can be covered without hiding the image. Real frame thickness and the shelf’s depth may rule out the overlapping version altogether.
Keep the important part of each picture visible
Put a small frame in front only after checking what it hides. A margin is different from a face, signature, caption or edge of a carefully composed scene. Overlap should not turn a picture into an unexplained fragment unless that is genuinely the presentation you want.
Try one larger frame toward the back and one smaller piece nearer the front, where the approved display arrangement permits it. Then remove any extra object that obscures both. A plant or ornament can be attractive beside art, but it also adds load and may introduce water, snagging or movement. It is not needed to make the display look finished.
Leave enough access to remove one picture without dragging it across another. If changing the front frame repeatedly knocks the others, the arrangement is too crowded even if it looks good in a photograph.
Judge the view from your usual seat
Look from the sofa, doorway or desk where you will actually see the display. The ledge’s front edge and the frames’ angle may hide more of the lower image from a low seated position than from standing directly in front.
Check reflections at that same position in daylight and with your usual evening lights. Do not solve glare by tilting a frame farther than its approved display arrangement allows. A different location or suitable glazing may be a better option.
Avoid choosing a sunlit shelf merely because it makes a bright photograph. The Canadian Conservation Institute’s paper-care guidance explains that light damage is irreversible and advises keeping works on paper away from direct sunlight and heat sources. The shelf does not protect the print from those conditions.
Treat furniture and frames as separate risks
Leaning a frame on a sideboard creates two questions: can the furniture tip, and can the frame slide or fall? Securing one does not automatically resolve the other. Follow the furniture manufacturer’s anchoring instructions and the frame or display system’s restraint requirements.
The US Consumer Product Safety Commission’s Anchor It guidance warns about children climbing furniture and recommends securing furniture as instructed. Do not make an attractive display into an invitation to climb, and do not leave an unsecured frame where a child, pet or passing bag can reach it.
For a heavy, glazed or valuable piece, or a location above a bed or seating, get a suitable mounting solution rather than improvising a lean. If you cannot establish a safe arrangement, choose another position or do not display it there.
Change the display without damaging the prints
Move complete frames carefully rather than repeatedly handling the exposed paper. Keep drinks, cleaning sprays and plant watering away from the work. Do not tuck an unprotected print behind a frame simply to add another layer.
Photograph a successful arrangement so you can restore it after cleaning. Keep a note of the approved frames and their combined weight; adding one small object later still changes the setup. The advantage of a ledge is an easy-to-change display, not freedom from checking what it carries.
If you want the same flexibility without overlap, compare six gallery-wall arrangements and test the best one with paper templates.
Editorial record
About this article
- Author
- Publisher
- GeMarkt
- Published
- Reviewed
- Internal source & rights check. Conducted by GeMarkt Research Review. This is an internal editorial check—not independent peer review.
- Source standard
- Buying guide source standardSeparates measured or first-hand evidence from general guidance and keeps practical limits visible.
Found a claim that needs checking? Report a factual error.