GeMarkt Blog · Practical guide
Plan a Gallery Wall on Paper First
Use measured paper templates to test a gallery wall before making holes, with a worked six-frame layout and a separate check for hanging hardware.

Cut a paper template to the outside size of each finished frame, label it, and test the arrangement on the wall before making holes. It is an inexpensive way to discover that a gap is too wide, a picture is too high or the whole group belongs somewhere else. The paper plan checks layout; it does not prove the wall fixings are safe.
Gather measurements before choosing a pattern
You need the actual width and height of each frame, a tape measure, paper, a pencil and a way to temporarily position the templates that is suitable for your wall finish. A ruler and a sheet of squared paper are useful for a smaller first sketch.
If the frames have not been bought, get their outside dimensions from the manufacturer. An advertised print size is not enough. A 30 × 40 cm image, a 30 × 40 cm sheet and a frame sold for a 30 × 40 cm print can occupy different amounts of wall.
Give each proposed picture a short label: A, B, C and so on. Write its subject and orientation on the template. Otherwise, when you move the rectangles around, you can lose track of which picture is meant to be upright and which is horizontal.
Mark the wall’s limits
Measure the usable width and height, then sketch anything the arrangement must avoid: a door swing, thermostat, switch, tall furniture or lamp. Check the normal walking route as well. A frame should not create a place where someone routinely catches a shoulder or bag.
If the group belongs over a sofa or sideboard, sketch that furniture in its real position. A wall centred on the room may not be centred on the piece below it. Neither alignment is automatically correct; the sketch lets you compare them deliberately.
Do not put a temporary fixing on wallpaper, delicate paint or another uncertain surface simply because it is described as removable. Follow its own instructions and test an inconspicuous area. You can also plan on the floor, take a straight-on photograph of the wall, or hold a template in position without adhering it.
Begin with one arrangement you can measure
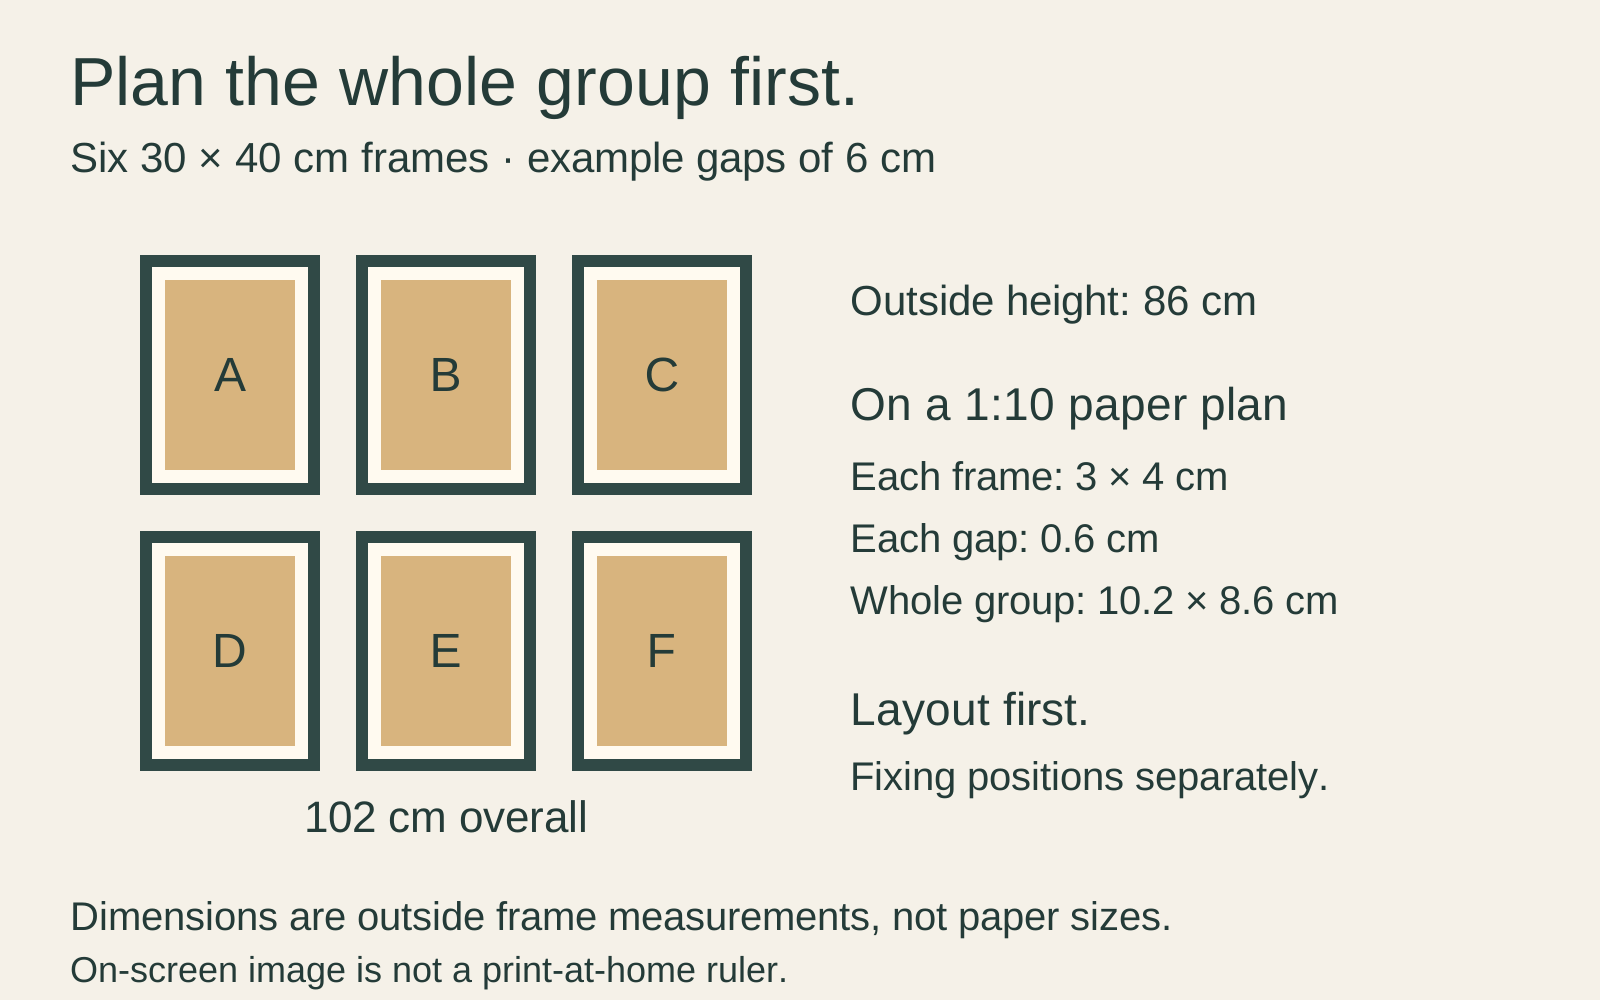
For a first attempt, a simple grid makes the arithmetic clear. Suppose you have six frames, each measuring 30 cm wide × 40 cm high outside. Arrange them in two rows of three with an example 6 cm gap:
- Total width: 30 + 6 + 30 + 6 + 30 = 102 cm.
- Total height: 40 + 6 + 40 = 86 cm.
On a 1:10 paper plan, draw each frame 3 × 4 cm and each gap 0.6 cm. The complete group is 10.2 × 8.6 cm on the plan. This scale helps you test alternatives without repeatedly moving full-size sheets.
The 6 cm gap is an example, not a museum standard or a minimum. Frame thickness, picture content and your viewing position can all affect what you prefer. The point is to make a first arrangement whose dimensions are known.
Transfer the plan at full size
Cut the six full-size templates and put them into the proposed positions. IKEA’s gallery-wall advice likewise recommends paper templates for aligning frames. Keep the original measurements written on each sheet so a folded edge does not quietly alter the plan.
Move the complete group before changing every individual gap. If the arrangement feels too high, six separate adjustments are harder to judge than moving the entire block downward. Once its position feels reasonable, experiment with spacing.
Stand at the entrance, sit where you normally sit, and walk past it. Open any nearby doors and move the relevant chair. A balanced photograph of the empty wall is not enough if the arrangement gets in the way during ordinary use.
Add the pictures, not only the rectangles
Paper outlines cannot fully show visual weight. A dark image in a heavy frame may attract more attention than a pale image of the same size. Put small printouts or simple colour notes on the templates to remind yourself what goes where.
For a mixed group, start with the picture you most want to look at, then position its neighbours. You can try aligning the top edges, bottom edges or centres of a few frames. You do not need to force every edge onto the same grid.
Take photographs from one fixed position as you compare arrangements. Label them with the frame order and gaps. Otherwise, a favourite layout can become impossible to reconstruct from a slightly angled phone photo.
A template edge is not a hook position
Do not make a hole at the top of every paper rectangle. The fixing belongs where the frame’s hanging system requires it, which is often lower. Measure the actual frame and follow the hardware instructions after settling the layout.
For a simple illustration, suppose a frame’s top should sit at 170 cm above the floor and its verified support point sits 5 cm below that top when hanging. The support point would be at 165 cm. Wire, paired fittings and proprietary rails require their own measurements; the example is not a universal fitting method.
The Canadian Conservation Institute’s display guidance emphasises hardware capacity and wall compatibility. If drilling is involved, have the wall assessed for concealed services and use suitable fixings; get an installer when uncertain. Adhesive products have specific limits too: 3M’s Command Picture Hanging Strip instructions exclude placement over beds and on wallpaper. A layout sketch cannot override that restriction.
Keep a small record when you are done
Save the final photograph, frame labels and measurements. If you later replace a print, check the new frame’s outside size and fitting position rather than assuming it matches the old one.
Planning on paper is not about achieving a perfect arrangement that can never change. It is about making the easy changes while they are still easy—before ordering the wrong size, placing the wrong fixing, or discovering that your favourite picture belongs on the other wall.
Editorial record
About this article
- Author
- Publisher
- GeMarkt
- Published
- Reviewed
- Internal source & rights check. Conducted by GeMarkt Research Review. This is an internal editorial check—not independent peer review.
- Source standard
- Buying guide source standardSeparates measured or first-hand evidence from general guidance and keeps practical limits visible.
Found a claim that needs checking? Report a factual error.