GeMarkt Blog · Practical guide
How to Hang Art: Height, Spacing and Tools
Plan a picture's height and spacing, translate its position into a hanging point, and choose tools only after checking the frame and wall.

Start by deciding where you want the picture to sit, using its outside frame dimensions. Then work out where its hanging fittings meet the wall. These are different measurements: putting a hook at the desired top edge usually leaves the picture too high.
A paper plan can resolve the appearance before you commit to a position. It cannot establish whether the wall or fittings will support the picture. Treat that as a separate decision, especially for heavy, fragile or valuable work. The examples below explain placement for a home display; they are not structural specifications.
Choose the view before the height
Look at the proposed wall from the place where you will enjoy the picture. In a sitting room, that may be the sofa rather than the doorway. In a hallway, you may see it while standing. Include the viewpoints of people who use the room at different heights, rather than treating one person’s eye level as a universal target.
Try a full-size paper outline, using a temporary attachment method compatible with the finish, or make a scaled drawing if the surface must remain untouched. Check it with the furniture in its normal position. A picture can be centred on an empty wall yet feel detached from the chair or console it belongs with.
For the calculation in this guide, imagine choosing a centre 150 cm above the floor. That is approximately 59.1 inches, but it is an invented starting position, not a museum rule. Move the outline if the real view suggests a better height. For questions about overall scale above furniture, begin with choosing a print size for your wall.
Measure the outside of the frame
Use the completed frame’s outside height and width, including its moulding, rather than the image opening. A print sold as 30 × 40 cm can occupy substantially more wall once a mount and frame surround it. Label the paper outline with those final dimensions so that you do not accidentally switch between print size and frame size.
Record the complete object’s weight as well. The Canadian Conservation Institute’s display guidance includes the frame, artwork and glazing in the hanging load. A weight estimate from the loose print does not answer that question.
Examine the back without placing delicate surfaces at risk. Identify the intended hanging fittings and ask the framer about anything unfamiliar. Do not move hardware into a thin backing board just to make the measurements easier. For an awkward or delicate object, let a framer or installer take the relevant measurements safely.
Calculate the contact point, not just the top
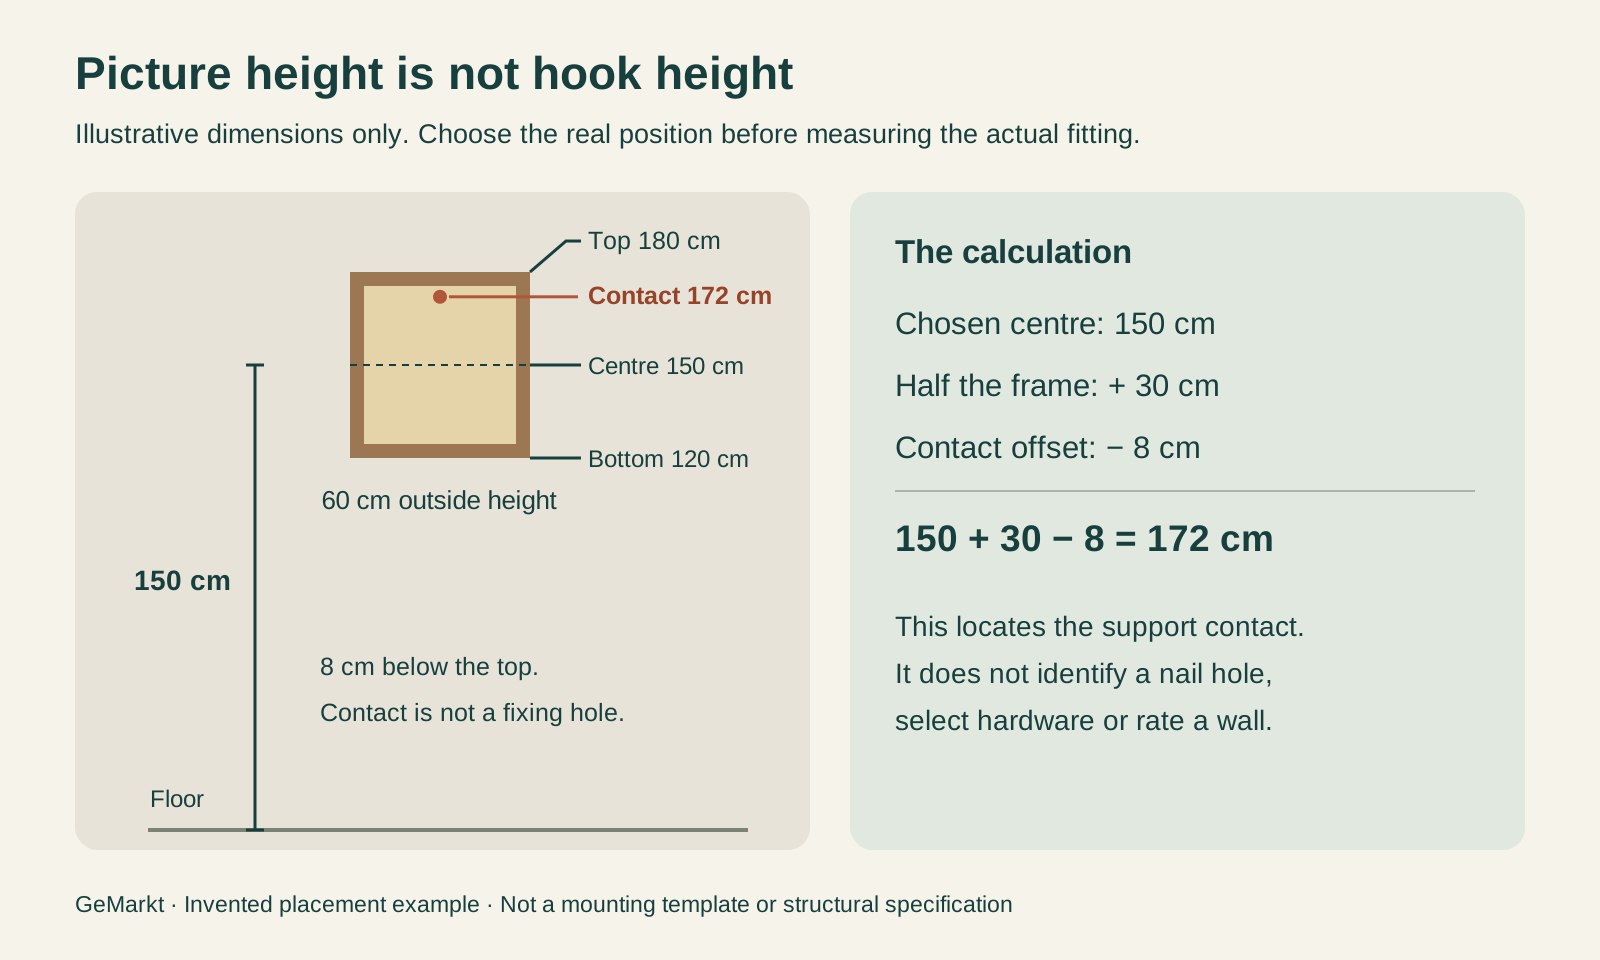
Imagine the outside frame is 60 cm high. With its centre at 150 cm, half the height is 30 cm, so its top would be at 180 cm and its bottom at 120 cm.
Now suppose its intended hanger contact is 8 cm below that top edge in the supported position. The wall contact height would be 180 − 8 = 172 cm. In one line: chosen centre + half the outside height − contact offset. This arithmetic locates a contact point; it does not choose a hook, anchor or screw.
Measure the offset for the real fitting, not a similar-looking frame. Wire changes position when supported; direct rings have their own contact points. Ask the framer for the supported geometry if it is not clear, rather than guessing from slack wire on a table.
For two separate hangers, establish each contact position and their horizontal separation. A manufacturer’s template may account for offsets between the supporting surface and the fixing hole. Keep that distinction in your notes so that a correct calculation does not become the wrong drilling mark.
Space a group as one composition
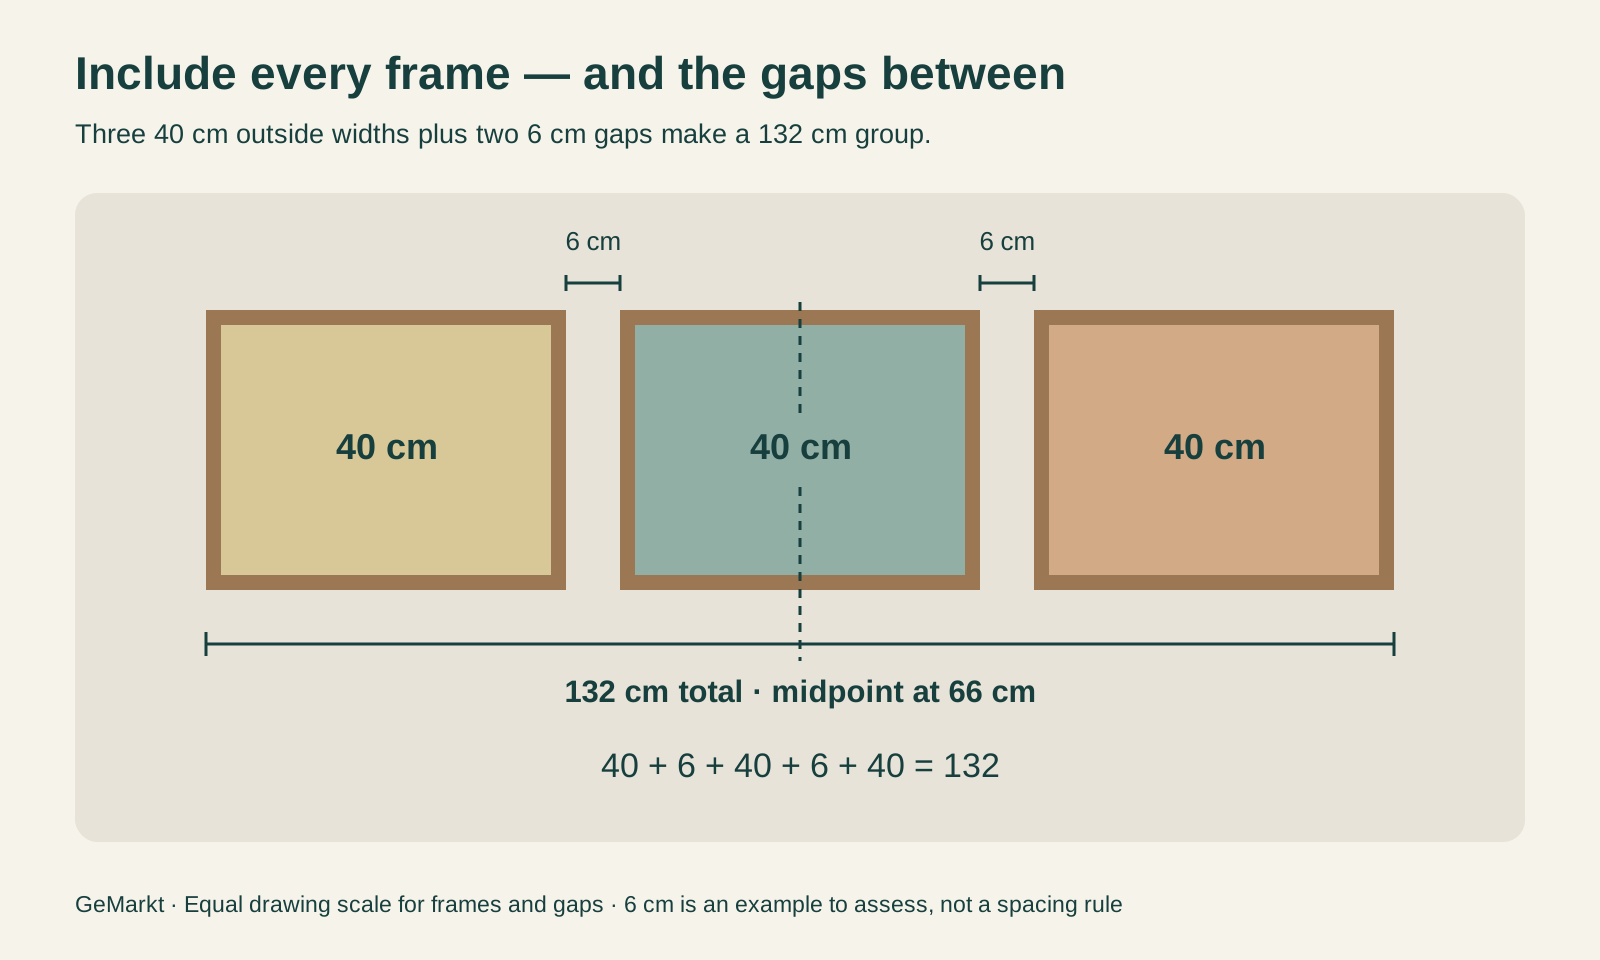
Start with a gap that looks intentional on the paper plan. Keep it consistent within a simple row or grid, then assess the whole arrangement from the normal viewing distance. Six centimetres can be an example to test, not a required gap for every frame style or room.
Three frames, each 40 cm wide, with two 6 cm gaps occupy 132 cm: 40 + 6 + 40 + 6 + 40. The centre of that group is 66 cm from either end. This tells you how much wall the arrangement needs before any hanging points are calculated.
With different-sized pictures, choose a clear relationship such as a shared centreline or aligned tops. The corresponding hanger heights may all differ. Number the frames and templates, and keep the planned arrangement with your measurements. Our guide to planning a gallery wall on paper develops this step before installation.
Check the wall before making a hole
Confirm permission where relevant, including the exact method on a leased wall. Identify the wall construction and finish before selecting a fixing. Painted plasterboard, solid masonry and a decorative surface are not interchangeable descriptions of what will support the load.
Hidden services need separate attention. A detector’s blank reading is not proof that a wall contains no pipe or cable. Bosch’s UniversalDetect limitations describe situations in which objects or live cables may not be detected. Use the exact instrument’s manual and reliable building information; if the construction or service routes remain uncertain, stop and consult a qualified installer.
Do not turn a preferred composition into an experiment above a bed, cot or busy seat. Heavy, oversize or unusually fragile work needs an installation assessment appropriate to the object and location. A smaller replaceable print elsewhere may be a better choice than forcing the original plan to fit an unsuitable wall.
Assemble tools for the confirmed method
A tape measure, pencil, paper outlines and level cover much of the planning. Keep a written measurement sheet so that you do not have to remember whether a number refers to the centre, top edge or hanger. Check units before transferring a measurement.
Installation tools depend on the confirmed wall and fitting. Use the manufacturer’s specified components and directions; this guide does not prescribe drill sizes, screw lengths or anchor types. Do not substitute whatever is already in a toolbox because its shape looks similar.
Adhesive systems also have instructions and exclusions. They are not a universal shortcut around a wall assessment. See renter-friendly display methods for examples of differing product conditions. Keep the artwork out of the work area while the mounting is prepared, and arrange suitable help for handling it.
Finish with a viewing check and a record
Once the appropriate installation is complete, check the appearance from the chosen seats and approaches. Confirm level against the plan, while remembering that a sloping ceiling or uneven surrounding furniture can affect what looks balanced. Adjust only in ways the installed system permits.
Keep the frame dimensions, complete weight, fitting identity and installation information. If you later replace the glazing, change the frame or hang a different object there, reassess the system rather than assuming the old position remains suitable.
If the frame shifts unexpectedly or an attachment separates, stop using it and arrange safe removal; do not test it by tugging or adding improvised reinforcement. An attractive arrangement is easier to enjoy when its appearance and its installation have both received attention.
Editorial record
About this article
- Author
- Publisher
- GeMarkt
- Published
- Reviewed
- Internal source & rights check. Conducted by GeMarkt Research Review. This is an internal editorial check—not independent peer review.
- Source standard
- Buying guide source standardSeparates measured or first-hand evidence from general guidance and keeps practical limits visible.
Found a claim that needs checking? Report a factual error.