GeMarkt Blog · Practical guide
Hallway and Entryway Art
Choose art for an entrance or corridor by checking the approach, door movement, frame projection and available light before filling a narrow wall.

Choose hallway art from the way you approach and pass it. A picture at the end of a corridor is seen differently from one beside your shoulder, and an entrance wall must also accommodate doors, coats and people carrying things. Start with the available view and route, then choose the image and finished frame.
You do not need to fill every section of a long wall. One well-positioned picture can give an entrance a clear point of interest; a short series can reward a slower walk through the house. Decide which experience you want before buying a matching set.
Choose between a first view and a passing view
Stand outside the room and enter normally. What can you see before turning, opening a cupboard or putting down a bag? That is the first view. A bold shape or clearly readable subject may work there because you notice the picture from farther away.
Then walk along the corridor. A side-wall print may be visible mainly at an angle until you stop beside it. Fine detail can be enjoyable at that closer distance, but only if there is somewhere to pause without blocking another person’s way.
Choose one main position before planning a sequence. If the far wall already contains a door, alarm panel or busy coat storage, do not force a picture into the remaining sliver merely because it faces the entrance. A quieter side wall may give the work a better setting.
Measure what projects into the route
Measure the space in front of the proposed frame, not only the wall width behind it. Frame depth, a console, a radiator and a hook with a coat on it all occupy real space. A floor plan that includes only flat rectangles on the wall can hide those conflicts.
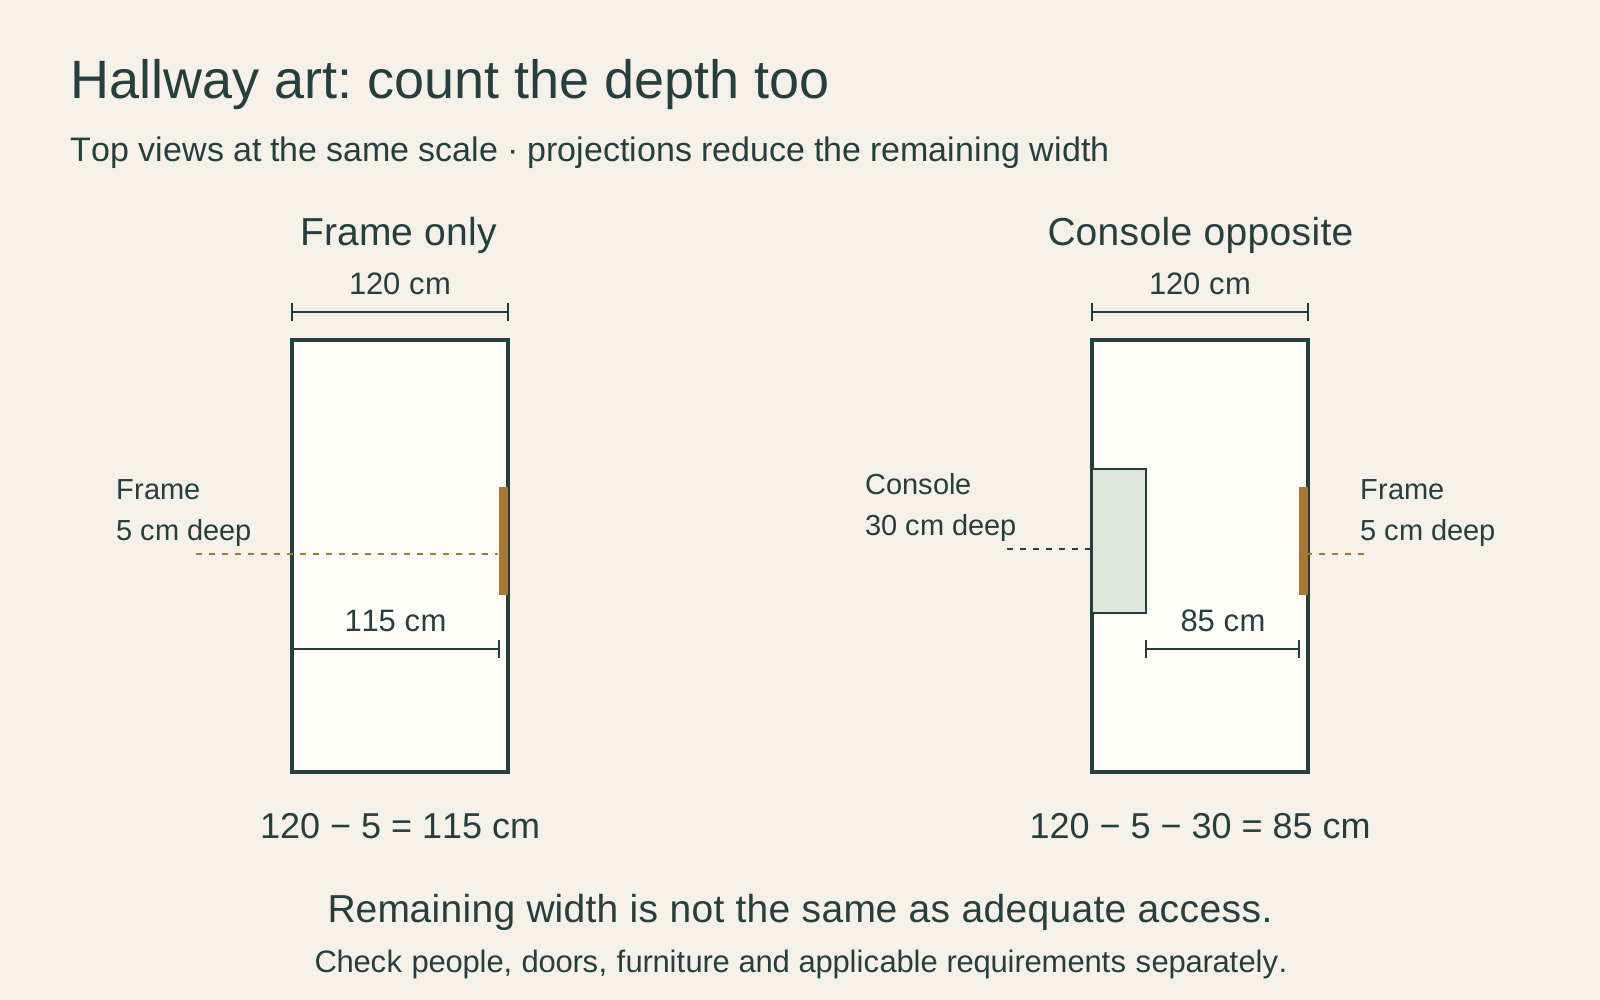
Here is a deliberately simple example. A corridor is 120 cm wide, and the complete frame projects 5 cm from one wall. At that point, 120 − 5 = 115 cm remains. Add a 30 cm deep console directly opposite, and the remaining width becomes 120 − 5 − 30 = 85 cm.
Those numbers are a subtraction exercise, not a recommendation that either remaining width is adequate. Actual access needs, doors, mobility equipment and applicable building requirements must be assessed separately. If the arrangement restricts the route, remove or relocate the object rather than treating the drawing as permission.
Check doors, coats and everyday movement
Open every nearby door fully, including cupboards and the entrance door. Check the handle as well as the door edge. A picture can fit the wall when the door is closed and still be struck every time somebody comes home.
Repeat the test with coats hanging, shoes stored and bags in the places they actually occupy. Include the person who uses the largest bag or needs more room to move. Keep the route useful for the household rather than arranging it around an empty-hall photograph.
Watch where shoulders and objects pass the wall. A decorative frame with projecting corners may be a poor choice at a narrow turn even if its outside width fits. Moving the picture to another section is often simpler than trying to protect it with more objects.
Match the image to the viewing distance
For an end-wall view, compare the picture from the approach rather than from a close-up screen. A small subject surrounded by a wide mat can become difficult to read from the other end of the hall. A larger visible image may help without increasing the frame as much as you first expect.
For a close side-wall position, a drawing, botanical study or detailed print can invite inspection. Check whether the image needs context you want to provide. A decorative map with tiny place names is appealing only if you can comfortably see the names that matter to you.
Keep proportions intact. If the wall is tall and narrow, try a portrait-shaped image or a short vertical grouping before cropping a landscape into a strip. Our orientation guide explains how the shape of the image differs from the space around it.
Give a group a clear reference
For several frames, choose a shared line: centres, top edges or a deliberate overall shape. It need not be perfectly symmetrical, but a repeated reference helps you compare the arrangement rather than adjusting each picture in isolation.
Count the gaps. Three outside frames, each 30 cm wide, with two 8 cm gaps need 106 cm in total. That group will not fit a 100 cm wall simply because each individual frame seems small. Mark the whole span on paper before choosing the prints.
Use fewer pictures near a junction or a visually busy entrance. A continuous row that looks good in a long photograph may become interrupted by doors, switches and corners in the real space. It is fine to leave a gap where the building changes direction.
Test the light you actually have
Look at a sample or preview under the hall light, with the nearby doors in their normal positions. Borrowed daylight may disappear when a door closes. Check reflections in any glazing from the entrance and from the side as you pass.
Choose a picture you still enjoy in those conditions rather than compensating with an unusually bright screen preview. A pale image may become subtle in a dim passage; a dark picture may still work well if its main shapes remain visible. Judge the actual image, not a rule that narrow halls always need pale art.
Sunlight through an entrance or stair window still matters. The Canadian Conservation Institute’s paper-care guidance advises avoiding sun and heat around works on paper. Do not place a print over a radiator simply because that wall is otherwise empty.
Protect the picture without cluttering the entry
Choose a suitable complete frame and attachment for the wall. Avoid propping a glazed picture on a narrow surface where a bag or sleeve can catch it. Any console should also suit the space and be secured as required by its own instructions.
Keep damp coats, umbrellas and cleaning sprays away from the work. Glazing is not a reason to let water collect around the frame. If an older frame is being reused, inspect it first; CCI’s framing guidance calls attention to loose joints, warping and damaged glass.
Try the position before buying
Use a paper template that shows the outside frame and the image within it. Mark the proposed projection without leaving a trip or snag hazard. Walk the route, open the doors and look from both directions.
If the position works, record the dimensions and photograph the template. If it does not, change the location before changing the whole image collection. A successful hallway arrangement leaves the entrance easy to use and gives the pictures a view in which they can actually be enjoyed.
Editorial record
About this article
- Author
- Publisher
- GeMarkt
- Published
- Reviewed
- Internal source & rights check. Conducted by GeMarkt Research Review. This is an internal editorial check—not independent peer review.
- Source standard
- Buying guide source standardSeparates measured or first-hand evidence from general guidance and keeps practical limits visible.
Found a claim that needs checking? Report a factual error.