GeMarkt Blog · Practical guide
How to Print a Digital Art Download
Choose the right download, check image and paper dimensions, prepare the printer settings, and approve a useful proof before ordering a large art print.

To print a digital art download, start with the delivered file rather than its preview, choose the intended image dimensions, and check the requirements of the printer or service you will use. Confirm the crop, borders and colour handling before paying for the final print. These decisions matter more than choosing the most expensive paper by name.
Find the delivered file
Save the original download in its own folder. If it arrives as a compressed archive, extract it before selecting the image. Read the included size guide and file names: a package may contain several proportions, not several interchangeable quality levels.
Do not print a screenshot of the listing, a room mockup or the image in a confirmation email. Those may be smaller previews or include objects that are not part of the printable artwork. Open the actual file and inspect all four edges. Check that it is the expected work, orientation and version before doing anything to it.
Keep the licence or purchase terms with the download and check that they cover your intended use and printing route. Buying a file does not automatically settle every possible reuse. For the rest of this guide, assume you have a file you are permitted to print for the use you intend.
Choose the image size and the sheet size
Write down two separate measurements: the printed picture and the paper around it. An 8 × 10 inch picture centred on a 12 × 16 inch sheet has a 2-inch border on the left and right and a 3-inch border at the top and bottom. A seller’s “12 × 16” might instead mean an image filling the sheet, so do not leave the distinction implicit.
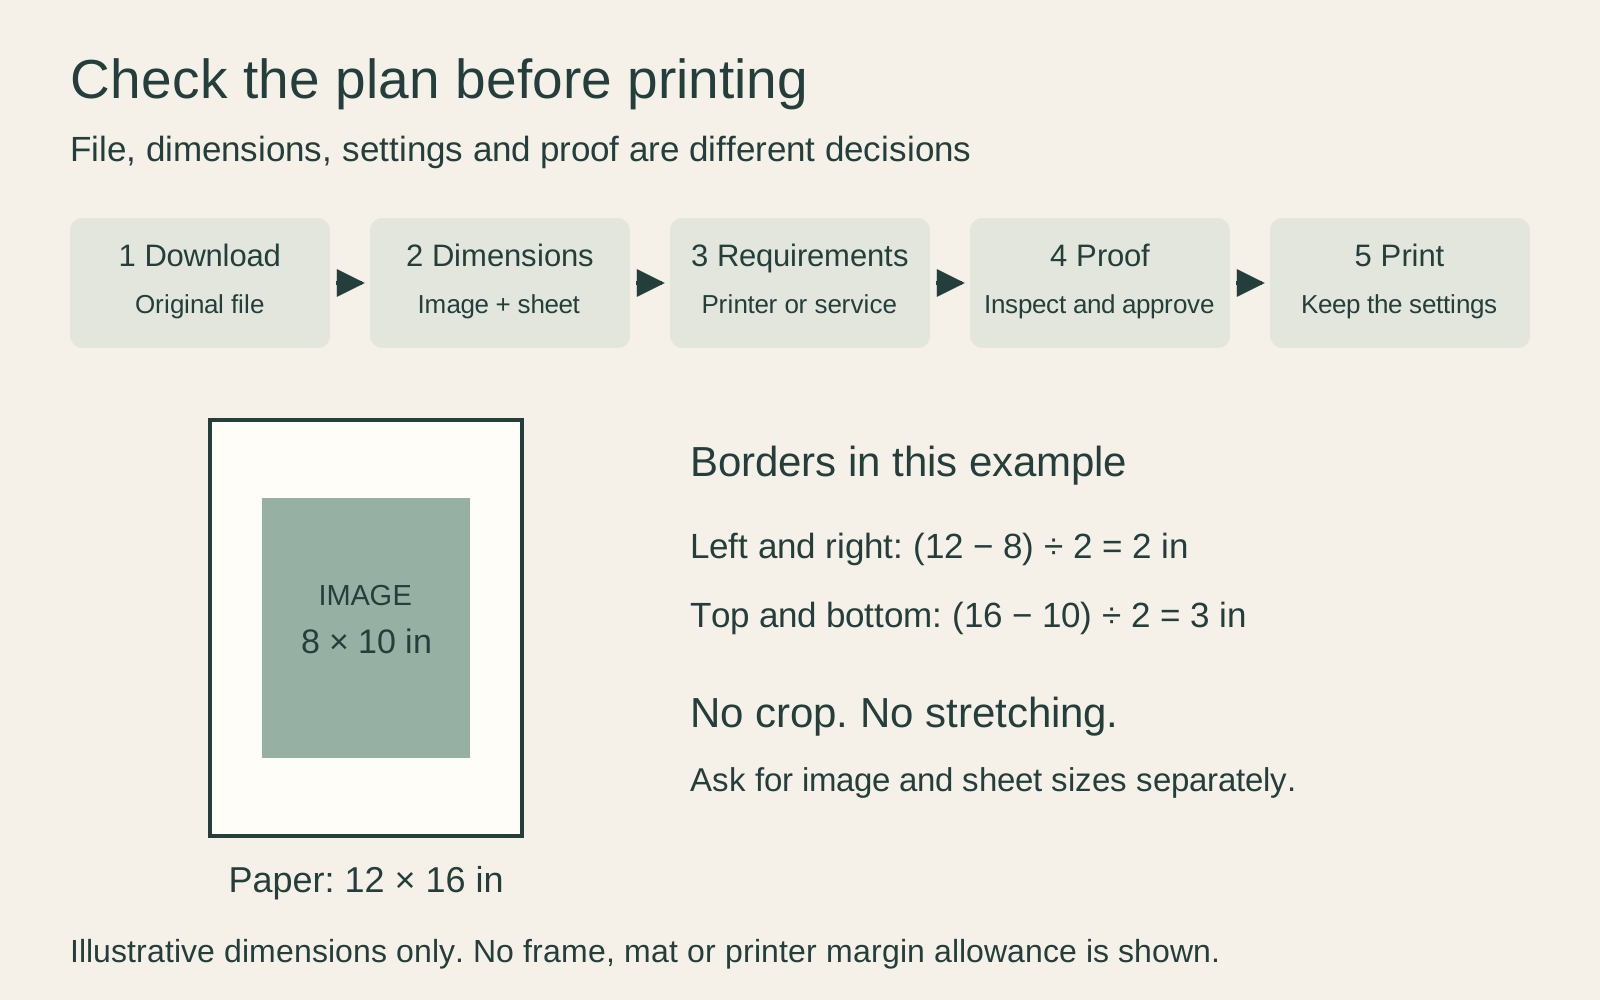
Next compare proportions. An 8 × 10 picture has a 4:5 ratio; a 12 × 16 sheet is 3:4. The borders in the example accommodate that difference without stretching or cutting the image. If you want edge-to-edge printing instead, ask for an explicit crop preview. See the print-size reference when converting between inch and centimetre labels.
Decide who will print it
Home printing gives you immediate control over small tests, but only within your machine’s supported sheet sizes, materials and settings. Check the printer manual before feeding thick fine-art paper into a normal tray. A larger or unfamiliar material is a reason to speak to a print service, not to improvise around the printer’s limits.
For a service, ask for the complete price and what it includes: paper, trimming, borders, proofs and shipping. A local shop can be useful if you want to discuss a sample in person; an online service can work well if its upload preview and specifications make the decisions clear. Neither route is automatically more colour-accurate.
Confirm the file and colour requirements
Ask which file formats the service accepts, the required pixel dimensions at your size, and the colour profile it expects. An ICC profile describes how colour values should be interpreted. Do not remove an existing profile or convert an unfamiliar file simply because a menu offers the option.
Printful’s file guide, for example, specifies accepted formats and recommends sRGB for its own workflow. Another service may give different instructions. Follow the destination’s actual specification, not a universal rule that every print file must be CMYK or must be a PDF.
A PDF can contain a low-resolution image; putting a small JPEG into a PDF does not make it sharper. If the supplied file seems too small for the chosen print, ask the seller for the correct original rather than enlarging a preview. Keep any converted delivery copy separate from the source.
Check scaling before you press print
For a PDF laid out at the intended physical size, inspect the print dialogue carefully. Adobe’s Acrobat instructions distinguish “Actual size,” which applies no scaling, from “Fit,” which resizes the page to the printable area. Actual size can clip material that does not fit; it is not a way to override a printer’s margins.
If exact dimensions matter, measure a test print. Check the application and driver settings for additional scaling or borderless expansion. For an image file, set its intended dimensions explicitly and inspect the preview; do not assume that opening it at 100% on screen defines its size on paper.
Do not add bleed unless the printer requests it and explains the required trim size and extension. Bleed is image beyond the intended trimmed edge, not an extra visible white border. The aim is an unambiguous instruction, not a file filled with unnecessary marks.
Use one colour management workflow
For home printing, avoid having the application and printer driver both perform competing colour conversions. Adobe’s Photoshop printing guidance describes two routes: the application manages colour using the appropriate output profile, or the printer manages it. The corresponding driver setting must match the route you choose.
Use the paper setting and profile intended for your printer, ink and paper combination. If you do not have a suitable custom profile, follow the printer manufacturer’s supported workflow rather than borrowing an unrelated profile with an impressive name. For an external service, ask whether it applies automatic image adjustments and whether these can be disabled for an already prepared art file.
Approve the part that matters
A digital preview can reveal a wrong crop, missing border or mistaken orientation. It cannot show exactly how that particular paper will look in your room. For a large, expensive or colour-sensitive order, ask what physical proof or sample is available.
Check a demanding detail, a pale area, a dark area and any text. A proof of a detail should keep the final print scale; reducing the whole picture to postcard size answers a different question. Examine it under sensible viewing light, then under the light where it will hang. Do not judge it solely beside a phone at maximum brightness.
Keep the settings with the result
Save the approved output file and a short note recording image size, sheet size, crop, paper, printer or service, and colour settings. That makes a repeat order easier to explain and a problem easier to diagnose. It does not guarantee an identical future batch, but it removes avoidable uncertainty about what you asked for.
When collecting the print, check dimensions and condition before framing. If the image is clipped or the size is wrong, compare the result with the approved preview and order notes. Resolve the specific mismatch before paying for a frame around it.
Editorial record
About this article
- Author
- Publisher
- GeMarkt
- Published
- Reviewed
- Internal source & rights check. Conducted by GeMarkt Research Review. This is an internal editorial check—not independent peer review.
- Source standard
- Buying guide source standardSeparates measured or first-hand evidence from general guidance and keeps practical limits visible.
Found a claim that needs checking? Report a factual error.